![]()
![]()
![]()
![]()

Try for free OpenCVE on https://www.opencve.io or check documentation to install it yourself.
What is OpenCVE
OpenCVE is a platform designed to help you manage and monitor the CVE database. It synchronizes the list of CVE (Common Vulnerabilities and Exposures) and allows you to search, filter, and organize them based on various criteria.
Users can subscribe to specific vendors or products and receive notifications when a new CVE is added or an existing one is updated. These notifications can be delivered via Email, Webhook or Slack (additional notification methods, such as Microsoft Teams, are planned for future releases).
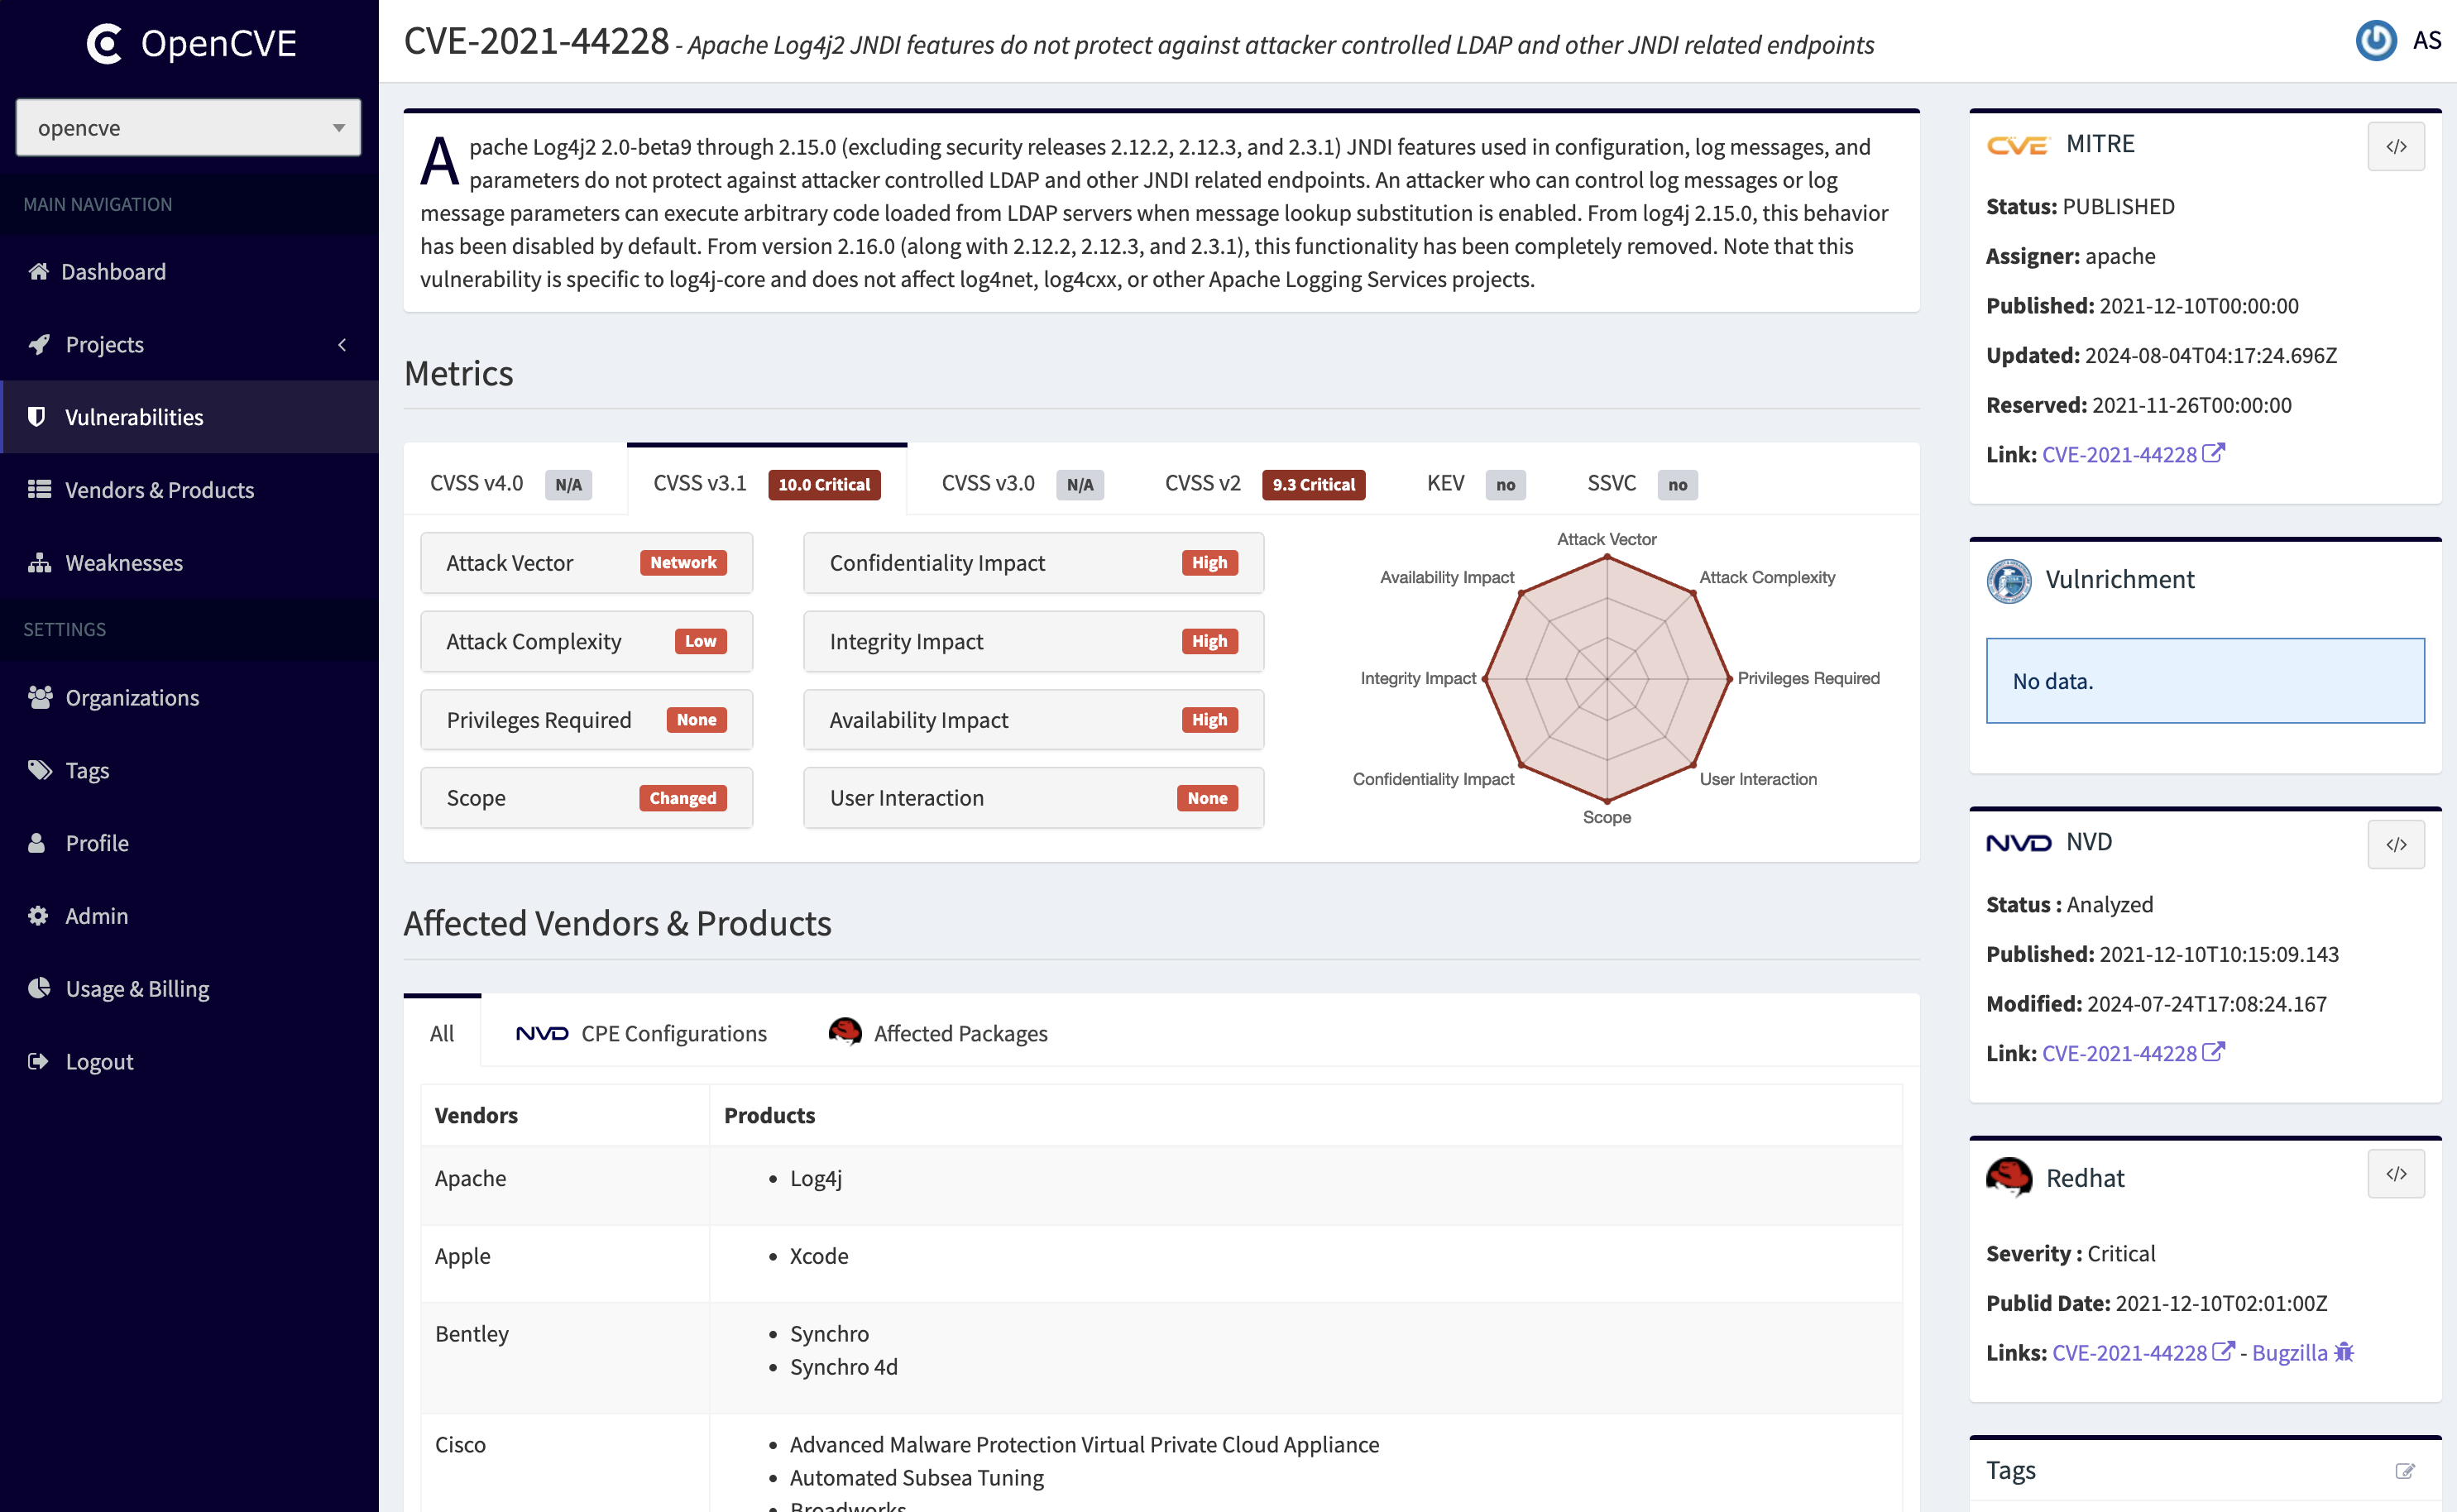
OpenCVE cross-references information from multiple reliable sources such as MITRE, Vulnrichment, NVD, and RedHat. This ensures that the vulnerability data remains accurate and up-to-date, even if one of the sources is temporarily unavailable.
Features
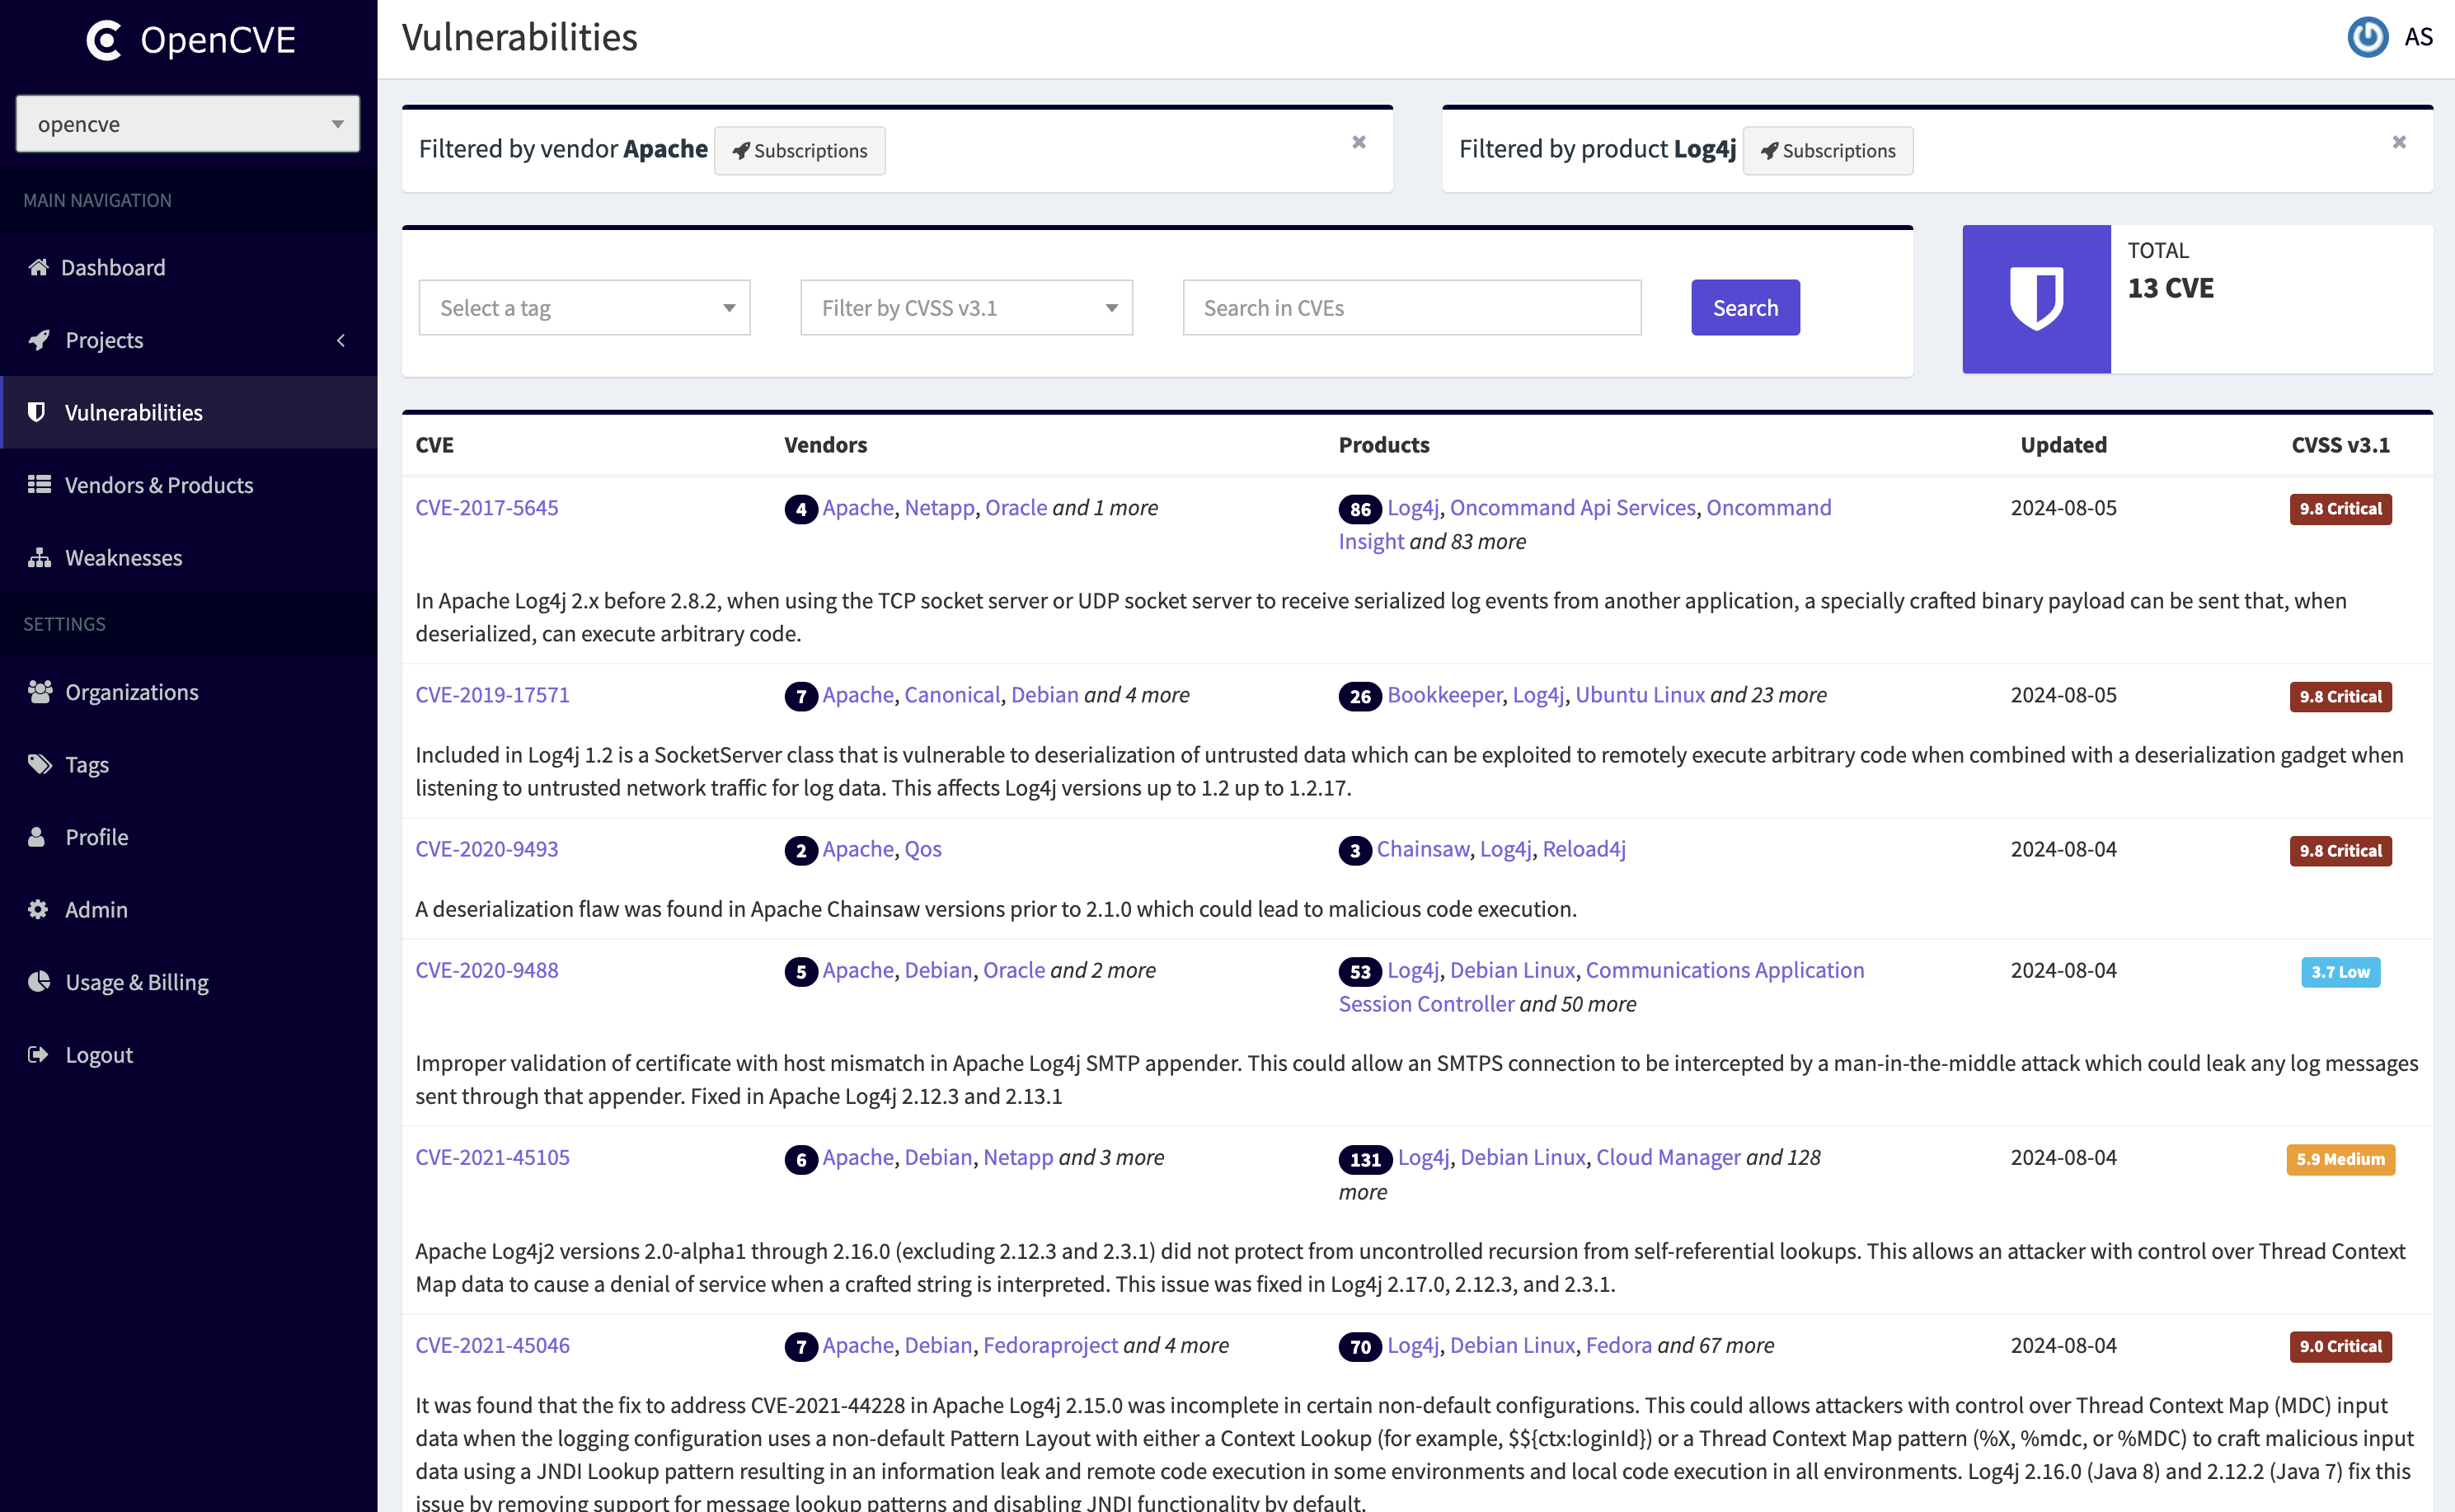
- Explore the CVE database and filter the results by Vendor, Product, CWE, CVSS, KEV or EPSS metrics
- Subscribe to vendors and products to follow the technologies you use (e.g. Apache, Microsoft, Fortinet, Cisco...)
- Organize your subscription in your organizations and projects
- Invite other members into your organizations
- Track CVE handling by assigning users to CVEs and setting statuses (e.g. under analysis, risk accepted, to be verified)
- Be notified for new CVE and for CVE updates based on filters, on different channels
- Analyse all CVE details (vendors, products, versions, CVSS score, KEV, EPSS, CPE, CWE, References...)
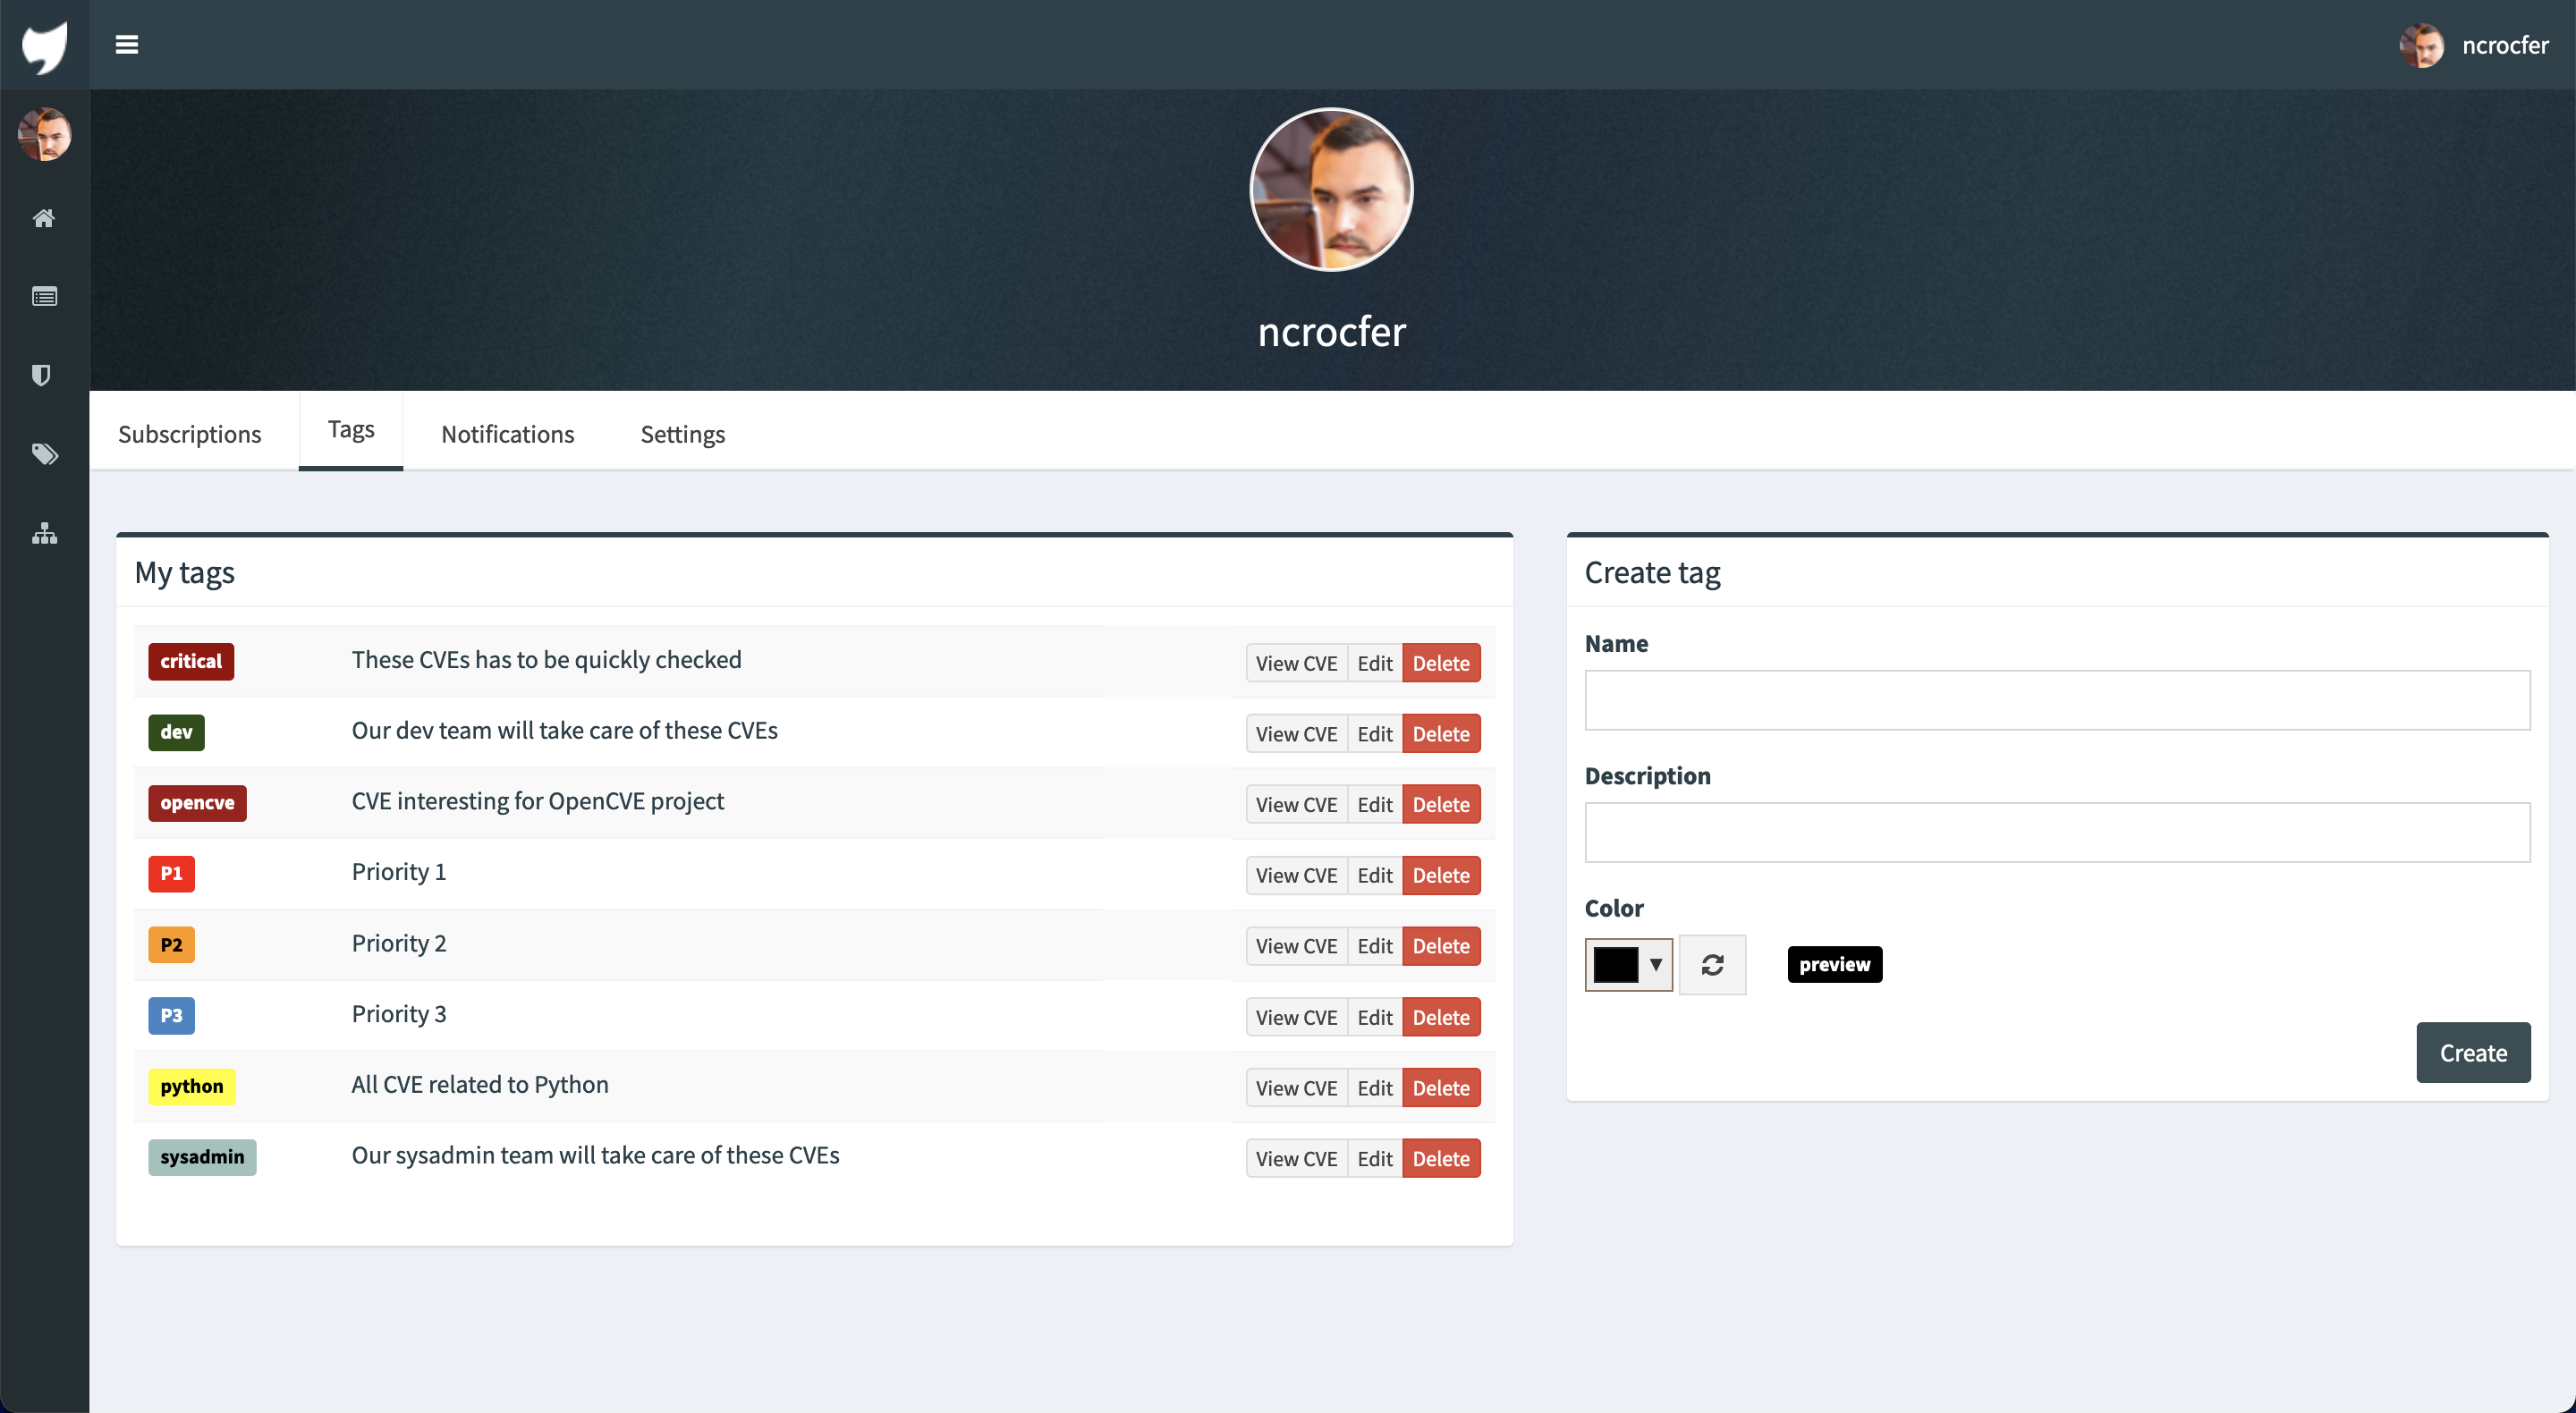
- Create custom tags (unread, important, devteam...) to organize the CVE list
- Display the history of each CVE and see their last changes in the homepage
- Retrieve the last changes in custom reports
- Customize the notification settings (type of change, filter by score...)
- Integrate OpenCVE with your own tools using the Webhook notification or the Rest API
You can use these features on the public instance: https://www.opencve.io.
How to Use OpenCVE
- Self-Hosted: You can install and configure OpenCVE on your own server using Docker. This provides full control over your instance.
- SaaS Version: Alternatively, you can use the hosted version of OpenCVE, available at https://www.opencve.io. This option requires no setup and is ready to use out of the box.
You can explore the documentation for detailed instructions like the installation, the notifications configuration or the API usage.